ShopTill-e Makes Stock Auditing Easy!
This Stock Audit Guide will show you how to perform quick and easy Stock Auditing using ShopTill-e. The system supports a range of devices and can be used with and without a barcode scanner connected to a tablet or Smartphone etc.
Please follow the step-by-step guide below to get started:
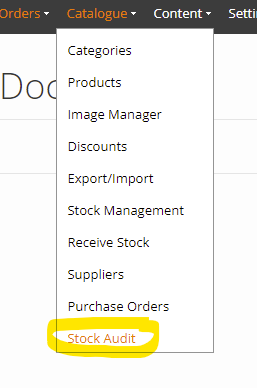
Step 1: Accessing Stock Audit
Begin by going to the Catalogue menu and selecting Stock Audit:
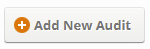
Step 2: Adding a New Audit
Click on "Add New Audit" located at the top right of the page.
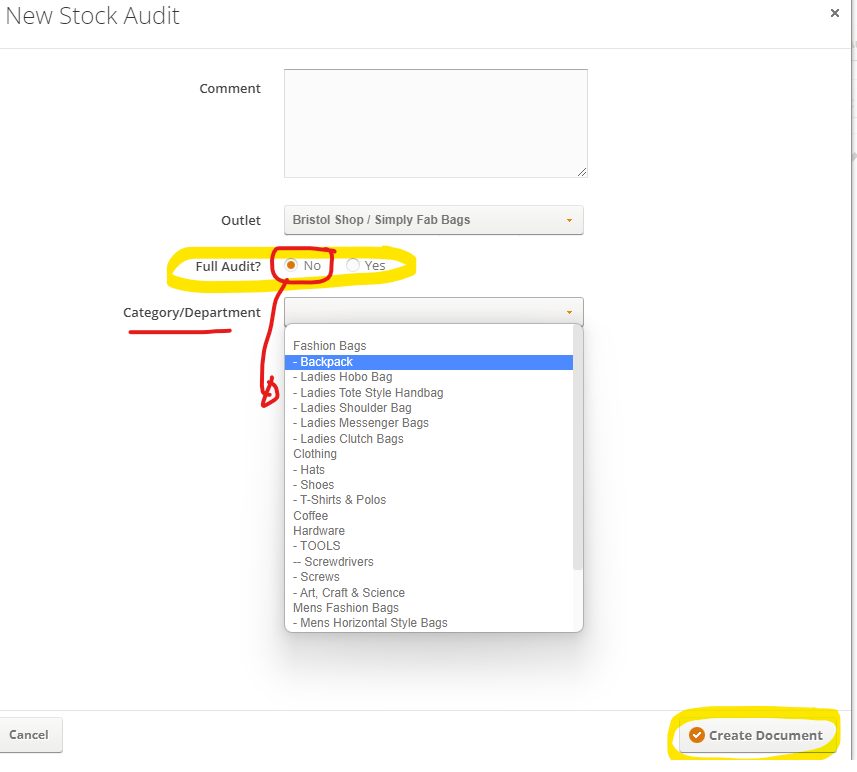
Choose between a full or partial audit (partial = No), then if partial select the department you want to count and click "Create Document".
Please note that you won't see the outlet drop-down if you do not have one of our multi-outlet/store plans.
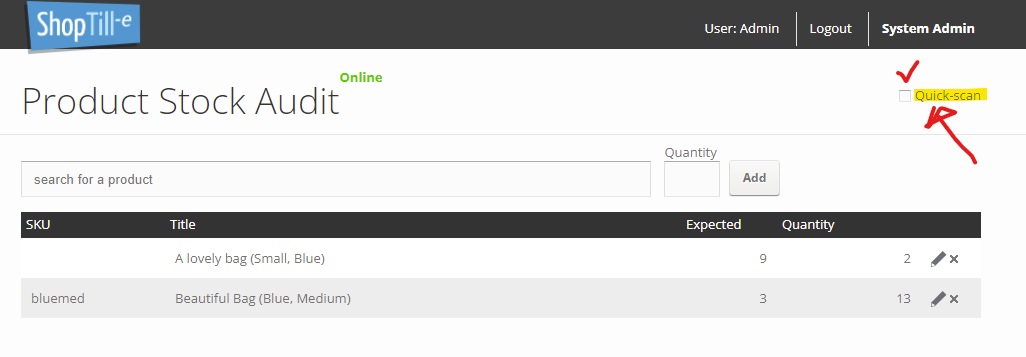
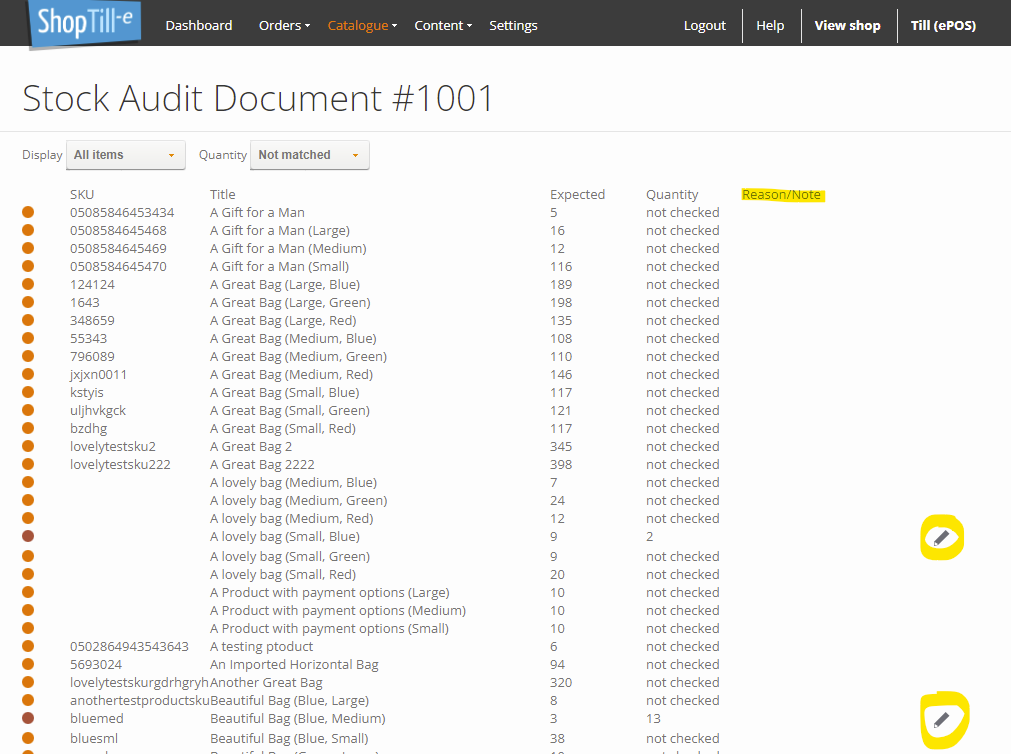
Step 3: Counting Items
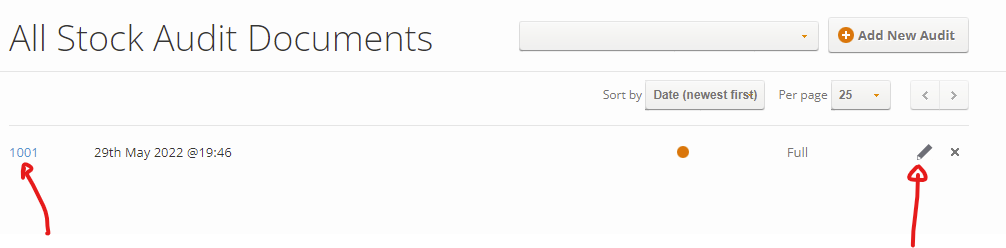
Once you have set up the audit, click on the pencil icon to the right to begin counting items.
In the counting screen, you have the choice of two input modes:
Quick scan: Just scan barcodes to count items, any item, just keep barcode scanning and the system will count them.
Keyword or barcode search: manually type in the quantity.
Please note that the counting screen works offline and automatically saves your progress.
You can come back to it later without having to save anything.
Tablet count view:
Smartphone count view:
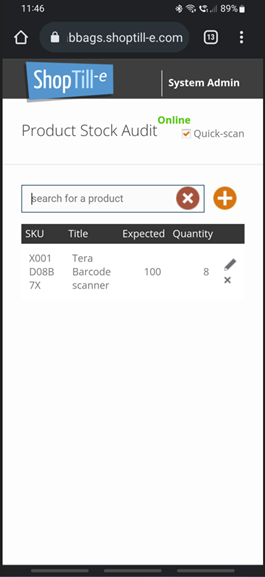
If you want to use a smartphone instead of a tablet with a barcode scanner, contact us for compatible scanners.
Step 4: Reviewing Reports
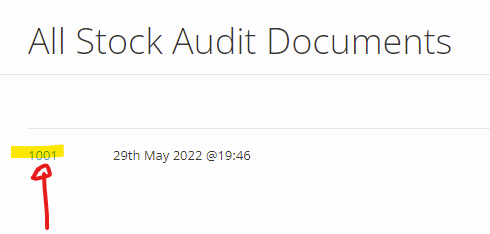
When you view a report, click on the document number to access it.
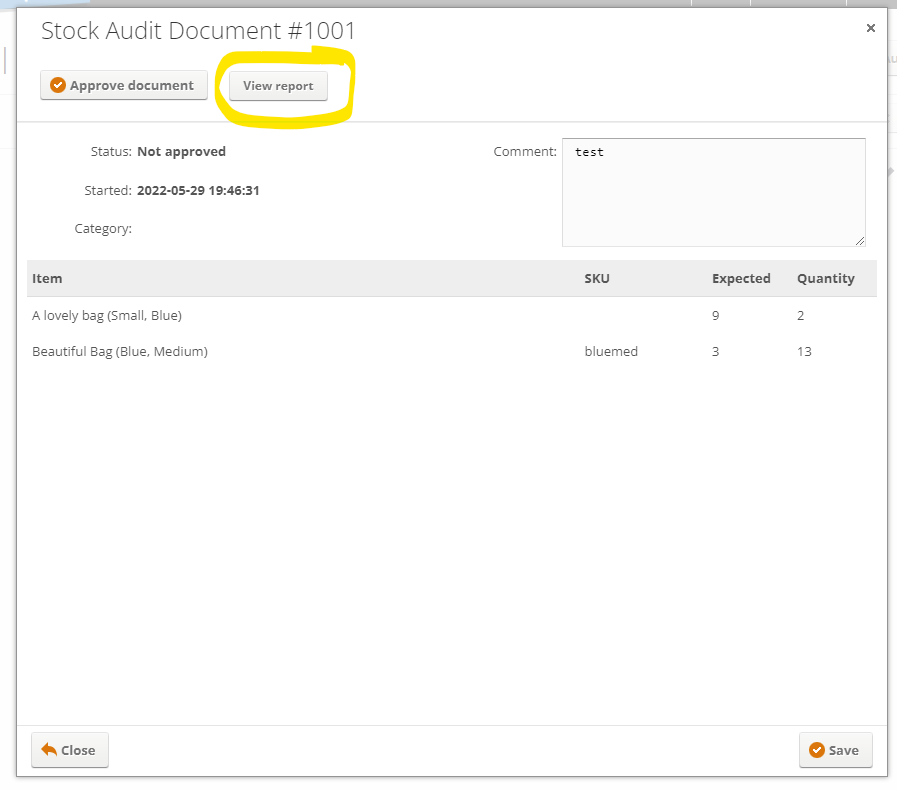
The report will show the status of counted versus expected items and will highlight any discrepancies. You can also add notes or a reason for discrepancies.
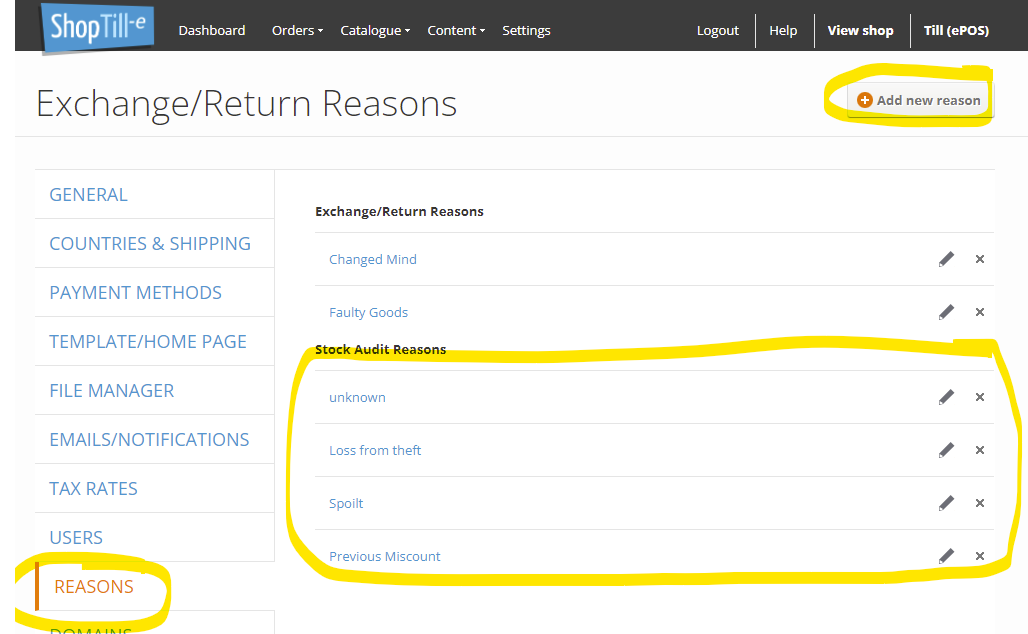
Note: To set up your own list of reasons go to 'Settings > Reasons' and add as many as you'd like these will be shown for stock audit count discrepancies:
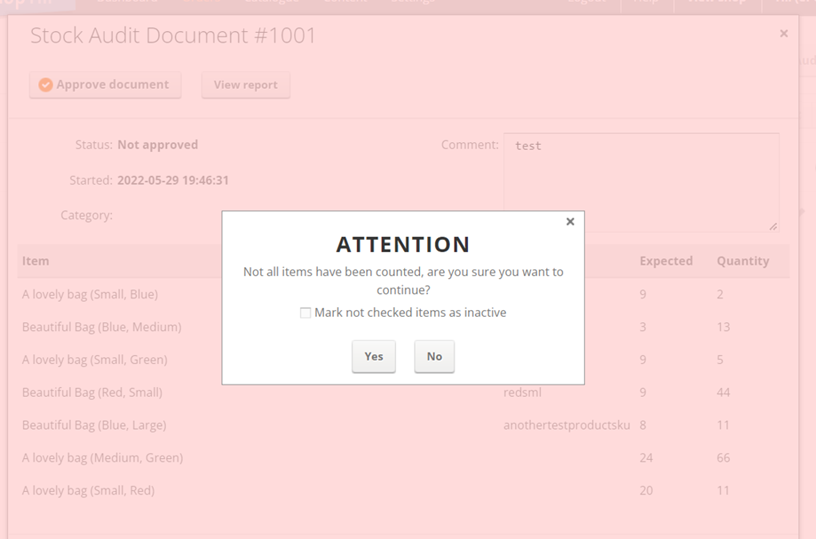
Step 5: Approving the Audit
When you are done counting items, click "Approve Document" to commit the audit to the stock holding. The software will warn you if any items have not been counted. You can choose to continue counting or commit and update the audit.

You also have the option to hide uncounted products. This checkbox will appear on the second confirmation page if unchecked items exist. If all items are checked, you won't see this option.
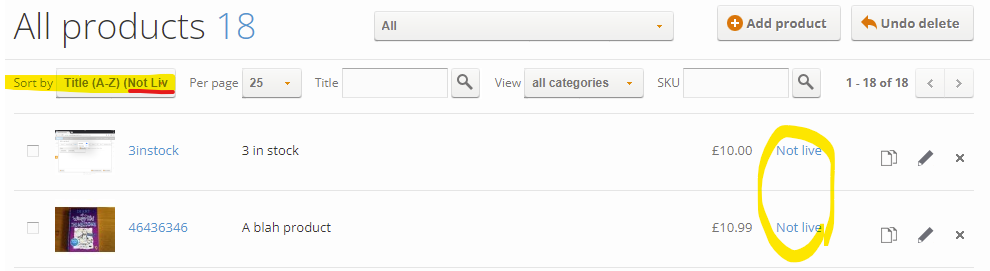
Step 6: Viewing Inactive Products
To view inactive products, go to the Catalogue menu and select Products. Use the "Sort By" filter to select "Not Live".
Once the audit is approved, it will be saved as a permanent record of the results. You can refer back to it whenever needed.
We hope this guide has been helpful in explaining how to perform a Stock Audit. If you have any further questions or concerns, please don't hesitate to contact our support team .